Home Recording Setup Essentials
Hey everyone! Hope you’ve been having a great week creating content. If you’re an artist or writer looking for that next step in your creative journey, setting up a home recording setup is a great step to take! Whether you’re a vocalist, guitarist, writer, aspiring producer, or podcast host, this is a great way to have easy access to a creative environment when inspiration strikes!
So… what all do you need?
Assuming you’re starting from ground zero, the essentials you’d be looking to get are a computer, microphone, headphones, and recording software. This list gets more complex depending on what specific craft you’re in, but these four elements are foundational for just about every recording setup scenario.
Let’s break these elements down a bit.
The Computer
Your computer is probably the most important piece of equipment you’ll need for recording. It’s going to be the home base of all your recordings. What kind of computer you get doesn’t matter much, but just make sure you have at least 16GB of RAM to make sure everything runs smoothly! If you’re looking to just record voice overs or podcasts, you can make do with 8GB of ram, but trust me - you’ll get projects where you need more RAM and it’s a pain to expand your computer’s hardware after the fact. Most audio professionals use Apple computers, but you can definitely achieve the same results and workflow using Windows computers.
Microphone
If you’re starting off from scratch, a simple USB microphone works great! However, make sure you buy one that’s meant for recording and not for Zoom calls :) You can go with any USB recording microphone product and it should work fine as a starting mic. A great one to start with is the Rode NT-USB. As you progress, you’ll want to upgrade to a condenser mic. We’ll get to that later on in this blog post though.
Headphones
The next thing you’ll want to get is a pair of solid headphones. You can definitely operate just fine on your pair of skullcandy’s, but eventually you’ll want to get something that accurately depicts the sound you’re recording! It just so happens that I recently wrote a blog about this too. You can check out my headphone recommendations here.
Software
(I have a blog post on this one too). Generally speaking, the process of recording happens within a DAW (digital audio workstation). A DAW is basically a program that allows you to record and edit audio. You can read more about the different kinds of DAWs in my blog on Music Production Software here.

Cool! So that’s most of the equipment you’ll need to start off. BUT what if you already have this stuff and you’re looking for the next step?
I got ya covered. Let’s talk about the next steps.
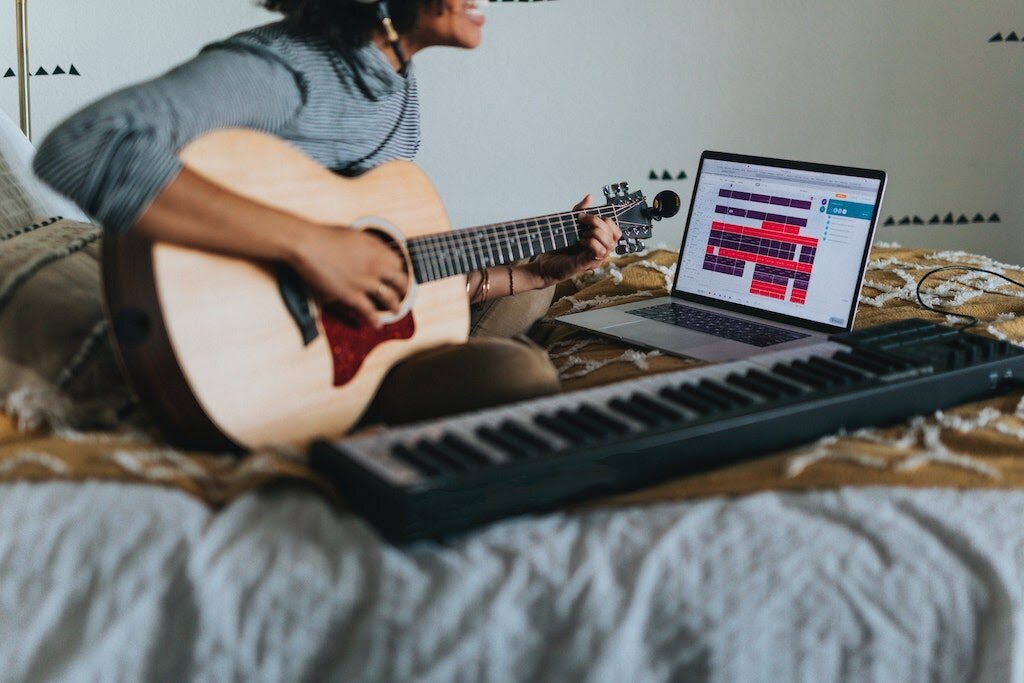
The next equipment you’ll want to look at purchasing would be a MIDI keyboard, audio interface, condenser mic, and studio monitors. These would help complete your home recording setup and allow you to create just about anything from home!
Let’s break this down a bit.
MIDI Keyboard
A MIDI Keyboard (keyboard like the instrument and not the thing I’m typing on right now) is basically a remote control for instruments within your DAW. It lets you send notes to your computer to play virtual instruments inside your DAW. It’s a little confusing to explain if this is your first time hearing about what a MIDI keyboard is, but just think of it as a piano that controls the sounds inside your DAW. My recommendation would be a Novation Launchkey. I’ve linked the 37 key version, but you can get any size that fits your needs!
Audio Interface
If you had the exact setup I mentioned in the first part of this blog, you’ll mostly be listening to your recordings over headphones that plug into your computer. That’s a great way to start, but what about when you need to hook up speakers or want to record some instruments that your USB mic can’t handle super well? That’s when an audio interface comes in handy! An audio interface basically converts sound waves to a digital signal that your computer can read and record. They’re pretty key to a home recording setup. If you’re looking for a good intro level interface, I recommend the Focusrite Scarlett Solo. It should do everything you need!
Studio Monitors
I know what you’re (probably) thinking. “Spike… if I’m working on a computer, I already have a monitor. Why do I need more?”
Well… studio monitors aren’t actually screens. Studio monitors are basically a fancy term for speakers that are designed to replicate audio accurately. These differ from regular speakers in that they’re designed to replicate exactly what’s going on in your recording. A lot of regular speakers are hyped up and made to boost bass or clarity. That’s not a good thing to have when creating music because you won’t know if what you’re making sounds good across all speakers or just the ones you’re listening on. Studio monitors try to fix that issue by replicating the sound as accurately as possible.
I don’t have a blog post on these yet, but if you want a good intro pair, I would look at either Yamaha HS5s, or JBL-LSR305s. These are both intro grade monitors that will represent your sounds accurately.
Microphone
I know, we’re talking about these again. However, there’s a big difference between USB microphones for recording and standalone microphones. These microphones can usually produce a cleaner sound and you’ll get a lot more control with them. You can check out this month’s blog post on microphones for my recommendations.
What about acoustic treatment?
If you’ve ever searched for recording studios on instagram or google, you’ll notice that a lot of studios have foam or wood hung on their walls. The purpose of this is to diffuse sound so you don’t get any reflections or mud from the shape of your room. These are great in professional studios, but for a simple home recording setup, you’ll actually want to steer away from these since they could do more harm than good.
The reason for this is because apartments don’t generally have the most ideal shaped rooms for mixing audio. Unless you specifically look for an apartment space that has an ideal room for a home studio, you won’t get any better sound by hanging foam on your walls. I would actually recommend you hang a thick blanket on the wall your monitors point to in order to absorb extra sound rather than rely on (really expensive) foam to do it.
That’s pretty much it!
Setting up a home recording setup is an incredibly exciting process. My biggest recommendation is to have fun with it. Your setup will probably change quite a bit over the next few years, so don’t spend too much time worrying about all the intricacies. Set up what you can now, and in the future, you’re always able to change it around!
Need help or have any questions? Hit me up here. I’m always down to help you get started.
Spike